Step-by-Step Guide to Setting Up Your First Hi-Fi Stereo System
This guide is for anyone who is just starting to explore the world of high-fidelity audio equipment and home stereo systems.
If this is your first or second home stereo system… You’ve come to the right place! We’ll walk you through the entire process, from planning and budgeting to choosing components and setting everything up.
If you’re already a Hi-Fi expert… You probably know most of what’s in this guide. Advanced users might find our more specialized tutorials a better fit.
Getting Started: Planning Your System
A simple two-channel stereo system has three core parts: a source (like a media player or turntable), an amplifier, and two speakers.
With so many options available today, choosing the right components can feel overwhelming. But don’t worry—we’ve got you covered.
Step 1: Set Your Budget
Before you start shopping, the most important first step is to decide how much you want to spend. A great-sounding stereo system doesn’t have to cost a fortune, but setting a realistic budget will help you focus your choices. You can build a fantastic entry-level system for a few hundred dollars, or you can spend many thousands. Knowing your budget from the start will guide you on where to invest your money for the biggest impact on sound quality.
Step 2: Take Inventory of What You Already Have
Do you own any stereo components that could be a starting point? Maybe you have a receiver your parents were about to throw out, or an old record player from your grandmother’s attic. Think about anything that might be useful. Even if it’s not the latest gear, we can start with what you have and upgrade from there.
This is the key benefit of building a component-based stereo system instead of buying an all-in-one unit. The sound quality will be significantly better, you’ll get more performance for your money, and you can upgrade individual parts as your needs change and new technologies emerge.
A Personal Story
Every Hi-Fi fan’s journey starts somewhere. For me, it was a dusty old receiver from my parents’ basement. I bought a pair of beat-up speakers on Craigslist. My dad gave me the power cord from a broken lamp and showed me how to use it as a speaker cable. Finally, I ran a wire from my portable CD player’s headphone jack to the receiver, and I was in business.
That first system wasn’t perfect, but it was the spark that ignited an audio obsession—one that has become my life’s work. Now, we’re ready to help you start your own audio journey.
Let’s begin!
Part 1: Choosing the Best Speakers
The foundation of any great-sounding stereo system is a pair of quality speakers. When you find a pair that truly “speaks” to you, the music will feel immersive and deeply engaging.
In this section, we’ll answer:
- What makes a speaker high-fidelity (Hi-Fi)?
- Should I choose bookshelf or floor-standing speakers?
- What’s the difference between active and passive speakers?
- Do I need a subwoofer?
The speakers you choose will influence every other component choice. Your decision should be based on your room size, your musical taste, and your budget.
Important Note: If you already have an amplifier, you must choose speakers that are compatible with it. We cover this in the amplifier section, so it’s a good idea to read that next to ensure your components will work well together.
What Makes a Speaker “Hi-Fi”?
We interact with speakers all day—on our phones, at the grocery store checkout, and even on our microwaves. A true high-fidelity (Hi-Fi) speaker is different. Its job isn’t just to make sound, but to reproduce it as accurately as possible to the original recording.
Here’s what a Hi-Fi speaker must do:
- Reproduce a Wide Frequency Range: The human ear can typically hear from 20 Hz (deep bass) to 20,000 Hz (or 20 kHz, high treble). A good speaker should be able to cover most of this range.
- Maintain a Flat Frequency Response: It’s not enough to just produce the frequencies; they need to be balanced. If the bass overpowers everything else, the sound won’t be accurate. The goal is to have a relatively equal sound pressure level across the entire frequency range.
- Sound Great to YOU: Ultimately, the best speakers are the ones that you love listening to.
Now, let’s look at the two most common types of Hi-Fi speakers.
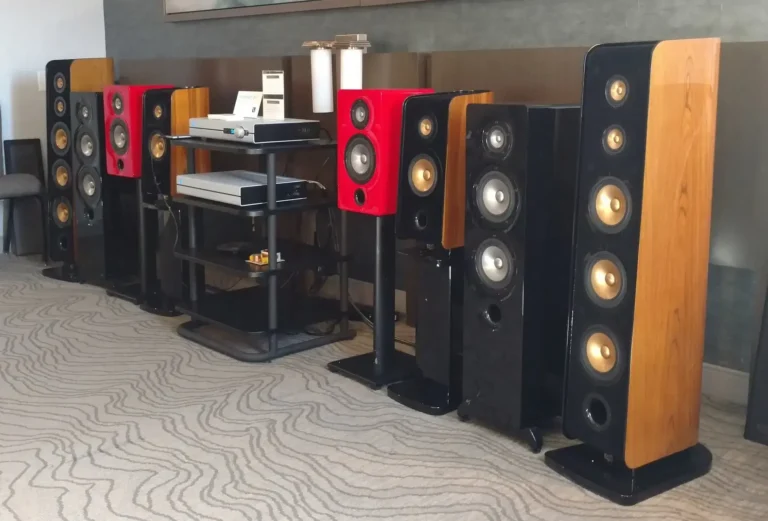
Bookshelf vs. Floor-standing Speakers
There are two main styles: bookshelf speakers like MARKAUDIO Cesti MB (which are smaller and can be placed on stands or furniture) and floor-standing speakers like MARKAUDIO Cesti T Tower(also known as tower speakers).
You can get fantastic sound from either type. If you’re on a tight budget or have a small room, bookshelf speakers are often the better starting point. Well-designed bookshelf and floor-standing speakers from the same product line will often share a similar sound signature, but towers have a few key advantages.
What’s great about floor-standing speakers?
- Deeper, More Powerful Bass: Their larger cabinet size allows them to move more air and produce lower bass frequencies than most bookshelf speakers.
- Larger Scale and Dynamics: People often describe the sound of floorstanders as more “full,” “powerful,” and “effortless,” especially in larger rooms.
- Often More Drivers: Their size allows for more and/or larger drivers (the cones and domes that create sound), which can lead to a more dynamic and detailed performance.
What’s great about bookshelf speakers?
- Excellent Value: Bookshelf speakers often provide more performance for your money. A tower speaker’s higher price reflects the cost of extra materials, more drivers, and increased shipping weight.
- Compact and Versatile: They are perfect for small to medium-sized rooms and are much easier to place.
- Incredible Performance: Modern bookshelf speakers have come a long way. Thanks to advanced design, they can produce a sound quality that rivals many larger speakers.
So, which should you choose?
- Choose bookshelf speakers if: You are on a budget, have a smaller room, or want the best possible sound for the lowest price. They are the perfect entry point into the world of Hi-Fi.
- Choose floor-standing speakers if: You have a larger room, want the most powerful and full-range sound possible, and have a bigger budget.
Active vs. Passive Speakers
This is another key choice. The difference is simple:
- Active speakers have amplifiers built directly into the speaker cabinet.
- Passive speakers require a separate, external amplifier to power them.
Neither type is inherently better, but they serve different needs.
Advantages of Active Speakers:
- Perfect Synergy: The built-in amplifier is perfectly matched to the speaker drivers by the engineers who designed them. This removes the guesswork and ensures optimal performance.
- All-in-One Simplicity: Many active speakers include built-in streaming capabilities, DACs, and various inputs. A pair can function as a complete stereo system, saving space and reducing clutter.
- Less Equipment: With the amplifier inside the speaker, you don’t need a separate box, freeing up shelf space.
Advantages of Passive Speakers:
- Flexibility and Upgradability: This is their biggest advantage. You can mix and match speakers and amplifiers from different brands to customize your sound. You can upgrade your amplifier later without having to replace your speakers.
- Wider Selection: The market for passive speakers is far larger and more diverse than for active models, giving you many more options to choose from.
- More Affordable (Initially): Passive speakers are generally less expensive than their active counterparts. If you already own an amplifier, they are the more cost-effective choice.
So, which should you choose?
- Choose active speakers if: You value simplicity, have limited space, and want a “plug-and-play” system with guaranteed great sound.
- Choose passive speakers if: You enjoy customizing your system, plan to upgrade components over time, or want the maximum number of options available.
Do I Need a Subwoofer?
Honestly? No, you don’t need one. The real question is: will you want one? Probably.
A subwoofer is a specialized speaker designed to reproduce only the lowest bass frequencies (typically below 80 Hz). While most bookshelf and even floor-standing speakers do a good job with bass, they often can’t reach the deepest notes you can feel as much as hear.
What a subwoofer adds:
- True Full-Range Sound: It lets you hear and feel the lowest frequencies in your music, from the deep rumble of a pipe organ to the heavy beat of electronic music or hip-hop.
- Improved Main Speaker Performance: By handling the heavy lifting of deep bass, a subwoofer allows your main speakers to focus on the midrange and treble, which they do best. This can result in cleaner, more detailed sound overall.
- Impact for Movies: If you plan to use your stereo system for watching movies, a subwoofer is almost essential for reproducing the impactful sound effects of explosions and action scenes.
“But I don’t like boomy, overwhelming bass!” That’s a common concern, usually caused by a poorly set-up subwoofer. A properly integrated subwoofer should blend seamlessly with your main speakers. You shouldn’t be able to tell where it is in the room; you should simply perceive the music as deeper, richer, and more effortless.
So, should you buy one?
- If you’re starting out on a tight budget or in a small room, you can definitely wait. Spend your money on the best pair of main speakers you can afford first. You can always add a subwoofer later.
- If your budget allows and you want the most immersive experience, a subwoofer is a fantastic upgrade. For fans of bass-heavy genres or movies, it’s a must-have.
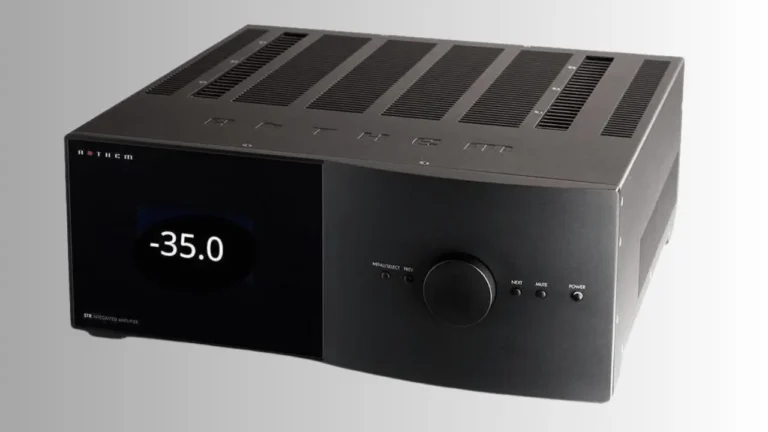
Part 2: How to Choose an Amplifier
You’ve picked your speakers. Now, if you chose passive speakers, you need an amplifier to power them. The amplifier’s job is to take the weak audio signal from your source and boost it enough to drive your speakers.
Choosing the right amplifier is crucial. It has a significant impact on sound quality, and a poor match can lead to disappointing results.
NOTE: If you chose active speakers, you can skip to the next section on audio sources!
We’ll focus on two key considerations:
- How to match amplifier and speaker impedance.
- How much power (watts) you need.
Matching Speaker and Amplifier Impedance
This sounds technical, but the basic idea is simple: you want to ensure your amplifier and speakers are a good electronic match.
Impedance, measured in ohms (Ω), is essentially the electrical resistance a speaker presents to an amplifier. If a speaker’s impedance is too low for an amplifier, it can cause the amp to work too hard, potentially leading to overheating and distortion.
The good news is that with modern equipment, this is usually straightforward. Just follow this simple rule: Your speaker’s impedance should be the same as or higher than the amplifier’s minimum rated impedance.
You will find the nominal impedance listed in the specifications for both speakers and amplifiers. Most speakers are rated at 4, 6, or 8 ohms.
- Same impedance (e.g., 8-ohm speakers with an 8-ohm rated amp): Perfect. This is the ideal match.
- Higher impedance speakers (e.g., 8-ohm speakers with a 4-ohm rated amp): Also perfectly safe. You won’t damage anything.
- Lower impedance speakers (e.g., 4-ohm speakers with an 8-ohm rated amp): Avoid this. This is the scenario that can strain the amplifier. Only do this if the amplifier’s specifications explicitly state it is stable with lower impedance speakers.
How Much Power Do I Need?
An amplifier’s power is measured in watts. More watts generally means the system can play louder without distortion.
Once again, for most home listening in a standard-sized room, you don’t need to obsess over this. Most modern amplifiers have enough power for most modern speakers.
Speaker specifications will often list a recommended amplifier power range (e.g., “40-200 watts”). You simply need to find an amplifier whose continuous power output (sometimes called “RMS power”) falls within that range. It’s generally better to have a little more power than you think you need. Under-powering speakers and pushing a small amplifier into distortion is more likely to damage them than using a powerful, clean amplifier.
A Practical Example:
Let’s look at the ELAC Solano BS 283 bookshelf speakers.
- The specs state a nominal impedance of 4 ohms.
- The recommended amplifier power is 40 to 200 watts per channel.
Now, let’s look at the ELAC DS-A101-G integrated amplifier.
- The specs show its continuous power output is 80 watts per channel into 4 ohms.
This is a perfect match! The amplifier is stable at 4 ohms, and its 80-watt output falls comfortably within the speaker’s recommended 40-200 watt range.
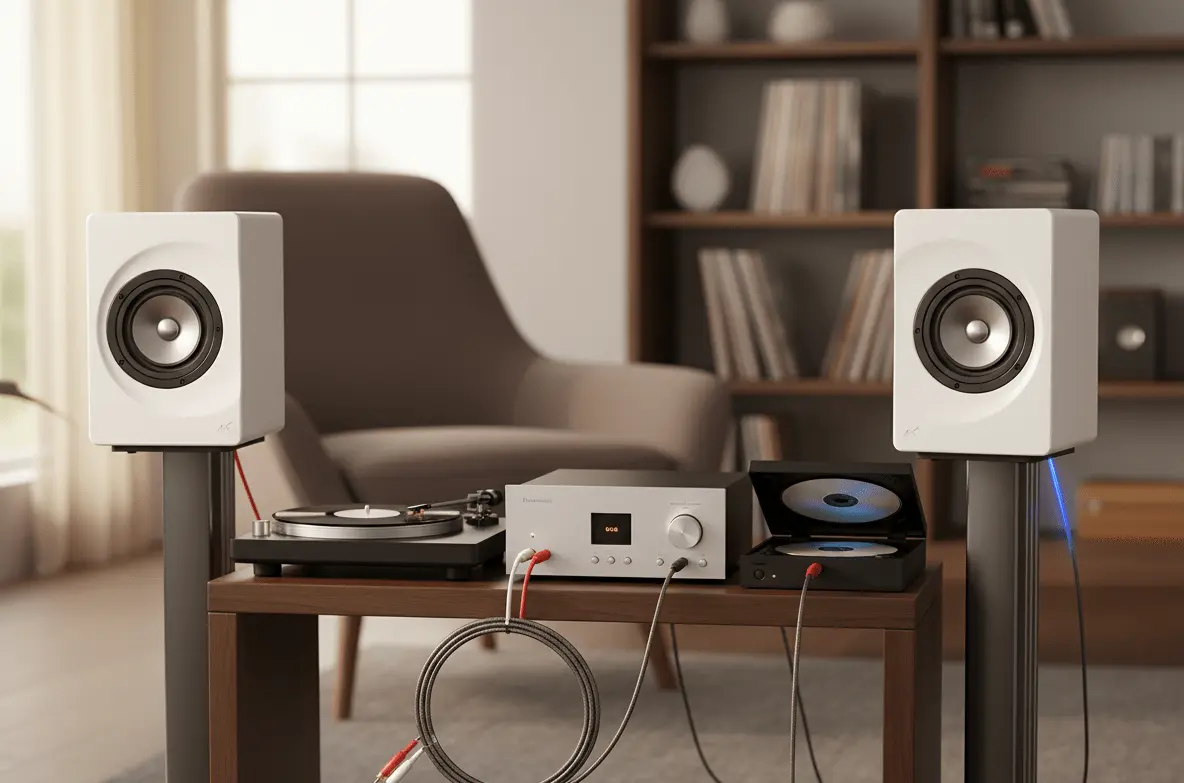
Part 3: Choosing Your Audio Sources
You have speakers and an amplifier. Now you need something to play the music! The source is where the audio signal originates. Its quality is crucial because the rest of your system can only reproduce what it’s given.
Sources can be divided into two main categories: analog and digital.
Analog Source: The Turntable
Want to get into vinyl records? It can be expensive and inconvenient—and it’s absolutely wonderful. There’s a unique, tactile satisfaction in dropping the needle on a record and listening to an album from start to finish.
A turntable uses a fine stylus to trace a physical groove carved into a vinyl disc, converting those vibrations into an electrical signal.
The Phono Preamplifier (or Phono Stage): A turntable requires a special kind of preamplifier called a phono stage. The signal from a turntable is extremely weak and needs a dedicated boost before a regular amplifier can use it.
- Many modern turntables have a phono stage built-in.
- Many integrated amplifiers and receivers also have a dedicated “PHONO” input with a built-in phono stage.
- If neither your turntable nor your amplifier has one, you will need to buy a separate, external phono stage.
Important: You only want ONE phono stage in the signal path. Using two will result in terrible, distorted sound.
Digital Sources and the DAC
Any digital audio—from a CD, a computer, or a streaming service—is stored as a series of ones and zeros. To hear it, that digital information must be converted back into an analog sound wave. This job is done by a Digital-to-Analog Converter, or DAC.
You have DACs in all your digital devices: your phone, your laptop, your TV. The quality of this DAC chip has a big impact on the final sound.
Many audio components have high-quality DACs built-in.
- CD Players: A CD player reads the disc and uses its internal DAC to send an analog signal to your amplifier.
- Network Streamers: These devices connect to the internet to play music from services like Spotify or Tidal, using their own DAC.
- Amplifiers with Digital Inputs: Many modern amplifiers have a built-in DAC. You can send a pure digital signal from your computer (via USB) or TV (via Optical) directly to the amp, bypassing the lower-quality DACs in those devices.
Should I buy an external DAC? For a beginner, it’s not necessary. But if you plan to use a computer as your main source, an external USB DAC is a fantastic upgrade that will offer a significant improvement in sound quality over your computer’s headphone jack.
Music Streaming
Services like Spotify, Tidal, Qobuz, and Apple Music offer access to vast libraries of music. You can stream them using a dedicated network player, or directly from your phone or computer via Bluetooth, AirPlay, or Chromecast to a compatible amplifier or active speaker.
Keep in mind that most standard streaming services use lossy compression (like MP3) to save bandwidth. This means some audio data is discarded. Higher-tier subscriptions often offer lossless or Hi-Res Audio, which provides much better sound quality. The better your stereo system is, the easier it is to hear this difference.
Part 4: Setting Up Your System
You’ve done the hard work of choosing your components. Now for the fun part: putting it all together.
IMPORTANT: Before connecting anything, make sure all your components are turned OFF and UNPLUGGED from the wall.
Speaker Placement for the Best Sound
Where you place your speakers has a massive impact on how they sound. Experimenting is key, but here are some guidelines to start with:
- Form an Equilateral Triangle: Position your speakers and your main listening spot so they form a triangle with equal sides. This creates a focused and balanced stereo image.
- Distance from Walls: Try to pull your speakers at least 2-3 feet (70-100 cm) away from the walls behind and beside them. Placing speakers too close to walls, especially in corners, can create boomy, muddy bass.
- Speaker Spacing: The distance between the two speakers should be slightly less than the distance from you to each speaker. If they are too close, the soundstage will be narrow; too far apart, and you’ll get a “hole” in the middle of the sound.
- Angle Them In (“Toe-In”): Aim the speakers so they point directly at your listening position. You can then experiment by angling them slightly outward to widen the “sweet spot” for more listeners.
- Tweeter at Ear Height: The tweeters (the smallest drivers) produce high-frequency sounds, which are very directional. Position your speakers so the tweeters are roughly at the same height as your ears when you’re seated. For bookshelf speakers, this is where speaker stands are invaluable.
Connecting Passive Speakers to an Amplifier
You’ll need speaker cable for this. The most important rule is to maintain correct polarity.
- Connect the positive (red, +) terminal on the amplifier to the positive (red, +) terminal on the speaker.
- Connect the negative (black, –) terminal on the amplifier to the negative (black, –) terminal on the speaker.
If you mix this up, the speakers will be “out of phase,” which results in thin sound with weak bass and a strange, unfocused stereo image.
Speaker Cable Connectors:
- Bare Wire: You can simply use the bare ends of the speaker wire. Twist the strands tightly and insert them into the screw terminals or spring clamps on your amp and speakers.
- Banana Plugs: These are connectors you can add to the ends of your speaker cable. They make connecting and disconnecting speakers much faster and more secure. Highly recommended for convenience!
Connecting Your Sources
This is usually straightforward. You’ll run a cable from the OUTPUT of your source component (e.g., CD player) to an INPUT on your amplifier or active speakers.
- Analog Connections (RCA Cables): These are the most common. They come in pairs, usually red for the right channel and white (or black) for the left.
- Digital Connections (Optical, Coaxial, USB): Use these to send a digital signal from a source to an amplifier that has a built-in DAC. Any of these will work great. If you have a choice, USB is often best for connecting a computer, while Optical is great for a TV.
Once everything is connected, plug your amplifier back in, turn it on, select the correct input, and play some music!
Conclusion: Your Hi-Fi Journey Begins
Congratulations! You’re ready to embark on an amazing journey into the world of high-quality sound.
Building a stereo system yourself is incredibly satisfying. You’ll get better performance for your money than any off-the-shelf system, and you’ll have a flexible foundation that can grow with you for years.
You can always start small and upgrade over time. Add a subwoofer to feel the bass. Expand to a multi-channel home theater system for movies. Explore the world of high-resolution digital audio or start your vinyl collection.
We hope this guide has been helpful. The goal is to find a system that sounds right for you and brings you closer to the music you love.
Happy listening by MarkAudio-Sota